Photographing The Rain
It would be ideal to only have nice weather when going out to photograph. And many photographers prefer sunny days. But what makes good or bad weather? Is it not all about perception, especially in photography? How could we just ignore those days when it’s pouring outside? Rain is such an impressive and dramatic phenomenon! It’s true, very demanding gear-wise, but so rich of photographic opportunities that one cannot just settle on capturing it from the comfort of the indoors.
To take pictures in the rain you will need special gear, weatherproof equipment, and also specific camera settings. Read on to find out everything you need to know for taking great photos when it’s pouring outside.
Preparations and Gear for Photographing in the Rain
Whether we are talking about heavy showers or even just a drizzle, your camera can suffer damage and it may be that just by covering it with your coat will not provide enough protection. Some say that even high-end professional cameras that come with weather seals or waterproof protection can do with that extra care.
How to Make Your Gear Waterproof
Also, be careful to distinguish between the two meanings. Only the cameras that are labeled “waterproof” offer the highest level of protection against rain and only so by pairing it with a lens that is also built to withstand the elements. For those of us who do not own a camera like this, fortunately, there are some workarounds.
Get a camera rain cover. They come in all sizes, and prices start from a few dollars. The more advanced ones have more functions like higher visibility and better ergonomics, but they are still on the cheap side.
Carry a plastic bag. When in lack of better options do not minimize the importance of such a basic object. It can help you achieve that sought-after shot and protect your camera while doing so. Just punch a hole in it big enough to fit the lens and be sure that the top plate of the camera is also covered by the bag. Stick your hands in there and you’re good to go. Elastic bands help secure the bag on the camera.
And a UV filter attached to the lens will prevent exposure to water. Pay special attention to zoom lenses. Due to the lens moving when changing focal length, water can infiltrate unnoticed.
Of essential importance is also having a soft cloth. You will keep it dry and tucked away in a pocket in case water gets on your camera which is almost inevitable.
Waterproof Yourself
It may seem that this one is a no-brainer but I can’t stress enough the importance of dry feet. It can make the difference between you going home disappointed without the results you were after or not minding the rain at all and continuing to shoot. An umbrella or a raincoat is the obvious choice here but you would want both your hands to be free.
Maybe try hiking clothes, a hooded rain jacket, and waterproof pants with rubber boots or hiking shoes. These are excellent options. Be sure to also protect your camera bag or backpack with a rain cover.
An Umbrella
That being said, do not entirely disregard the uses of the umbrella. While it protects you from the rain you can also include it in your shots to achieve interesting compositions. It can help you frame a subject, create leading lines, or provide a motif for your images. You can even cover the top part of the picture, where we often struggle with the highlights in the sky when shooting low angle shots, or simply hide unwanted elements.
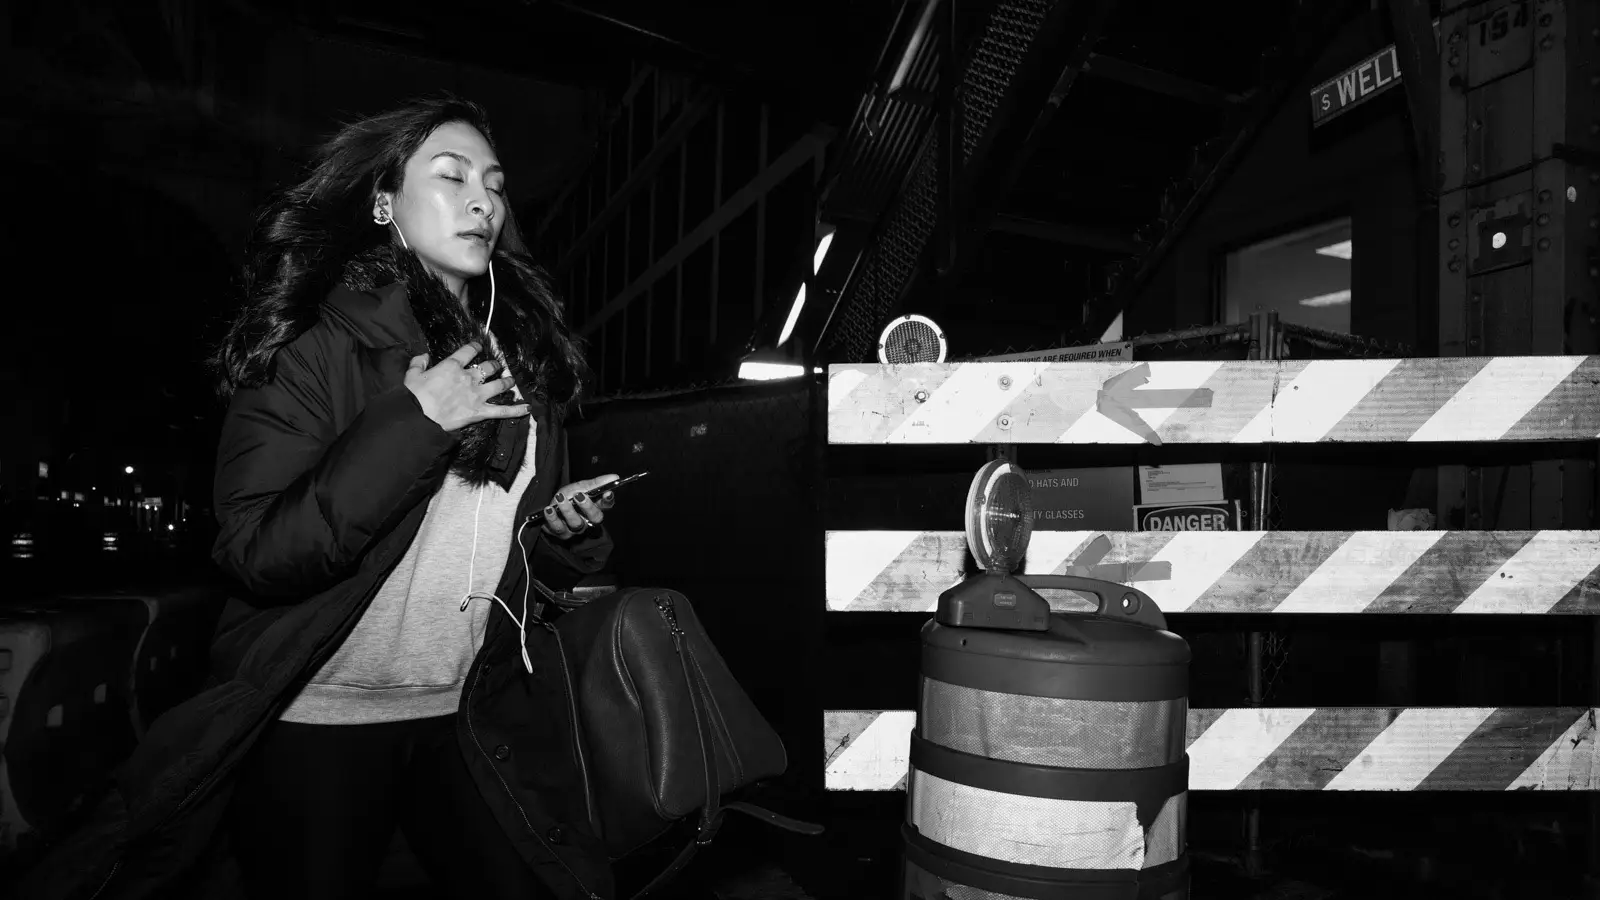
Shoot from Cover
This may be especially relevant while doing street photography in rain. Look for porches, tunnels, awnings, and after framing your shot camp there and wait for the subject. The interior of your car can also provide a good cover sometimes. That is if you can find a good parking spot. Also, a telephoto lens is of most help in this scenario.
Camera Settings and Creating the Shot
The topic of the camera settings is a subjective matter when expressing ourselves creatively. Different settings achieve different effects that can help us tell our story. When it comes to photographing in the rain though there are some parameters that you may think of more as starting points than guidelines.
Manual Mode
There is a good chance that the light meter in your camera won’t do a very good job in picking its own settings. Shooting the rain is a classic “tricky lighting situation”. The following sections will talk through how to pick the right settings for this kind of shoot, but if you aren’t familiar or comfortable with your camera’s manual mode I put together an easy to follow full guide on shooting in manual mode that you may want to take a look at before you proceed.
ISO
Remember that we are dealing with a lot of low light situations. This means that in order to avoid underexposed images you will want to keep the ISO on the medium to the high side. Try not to go over ISO 3200. This will also help you achieve fast shutter speed when trying to freeze the raindrops. Know your camera capabilities regarding the use of high ISO.
Keep in mind! At high values of ISO, noise appears and if you are not trying to create that specific grainy look, then noise is just something we do not want on our images.
Shutter Speed
A good starting point for the shutter speed would be 1/250 sec. If you are trying to freeze water splashes, for example, just like with every other object in motion, a faster shutter speed will do the job.
I would recommend you stay at 1/125 of a second or faster unless you want blurry images. Again, it depends on what you want to create. But from a technical point of view, if you want an image as sharp as possible, avoid slow shutter speed when photographing in rain.
The rule of thumb that says you can go as slow as your focal length doesn’t apply in this scenario. Remember, we are looking at water droplets and every single one of them is falling at high speed which will record a motion trail.
Aperture
I should start by mentioning that it would be ideal to use a prime lens with a large aperture when photographing in the rain. Aside from the well-known benefits of this type of lens, we can use all the help we can get in our particular situation. Especially if we are aiming for that fast shutter speed as I mentioned earlier. The line is thin and practice makes the best.
You will need to find that perfect balance between the aperture and the shutter speed because in a lot of situations you will want to capture an urban landscape. You will try to convey in your pictures that distinct melancholy that only on a rainy day can be felt, be it in an urban surrounding or in a natural landscape.
For that to happen you will want a large area to be in focus, a deep depth of field thus a small aperture. Start with an aperture of f/8 and adjust according to the desired effect.
Tripod
To keep that amazing rain in focus and to open up for yourself a whole new range of possibilities, consider bringing a tripod. It would be a more professional approach but amidst the chaos and rush that sometimes occurs during rainfalls, again, we’re thinking about an urban location, it is up to you if you want to carry it or not. It goes without saying that a sturdy weather-resistant tripod is preferable.
Photographing Rain
Now that we have taken all the precautions necessary to keep ourselves and our equipment dry, what if we decide that rain itself is a worthy subject to photograph? It’s undeniable that people react emotionally to rain. Whether for some it brings drama or even chaos, or for others, subtle melancholy or appreciative joy, when it’s raining, all kinds of photographic opportunities appear. For us to take advantage of them we need to mind some key elements.
Backlighting and Flashes
It’s all about emphasizing the water now. Key techniques in doing so are backlighting and the use of flash. Keep your eyes open for light sources that can make rain more visible. Especially in low light situations where it can be particularly difficult to photograph rain! These light sources can be natural, like the appearance of the sunlight just before the rain stops. They can also be artificial. Street lamps, light in shop windows, car headlights, all make great sources for backlighting.
If earlier we were talking about a shutter speed of 1/250 sec we will need to go faster now. A good starting point would be 1/500 sec. Keep in mind that the bigger the raindrop, the faster the fall so adjust your shutter speed accordingly.
Using the flash is also a great method to photograph the raindrops. Turning the flash power down is key here. You don’t want to light the raindrops too much so -3 stops is a safe starting point. Pop-up flashes are ok, but an off-camera flash will give you way more control and better results.
You will also want to choose your background carefully. Rain is more evident against a dark or blurry background.
Different Techniques
Getting close to your subject is a good idea in many types of photography. Rain photography makes no exception. Bouncing raindrops, water splashing from puddles, or rain hitting the ground are beautiful situations.
Use a telephoto lens to introduce bokeh in your shots and compress the image. Or why not get way closer with a macro lens and a whole new world of compositional possibilities will open for you. Not to mention that by using a macro lens you can create a “rain” scenario indoors where you have complete control. Spraying water on a piece of glass and carefully placing lights around it can make for a beautiful shot that can pass as a window. By getting close to it you can observe shape and texture.
If nothing else, you can photograph rain from the comfort of the inside but in this case the longer the focal length of your lens the better.
That being said, when clouds start rolling in, you now have little to no reasons to run for cover. Just grab your gear, remember all the tips we talked about and go make the most of this rainy day.


I am a photographer, writer, entrepreneur, and programmer living in the great city of Chicago. I love to solve problems with technology and share what I have learned along the way.